Sunday, August 28, 2011

Fresh Blackberry Cobbler

This morning started out like any other Sunday morning. Hit snooze on my alarm and slept another five hours before I finally got out of bed to do my morning run. The difference between today's run and any other is that it was sunny out. Normally I run at 5am and lately it is still dark when I'm out and about.

Today, though, today was special. About four minutes into my warmup I look over to the side of the road and see blackberry bushes. I was looking at the vines wondering if they were going to produce any blackberries and was starting to get disappointed when I wasn't seeing any green buds. That's when I "zoomed out" with my sight and realized that I had been focusing too much on the vines - I SHOULD have been looking at the ENTIRE side of the road! The whole side of the road was covered with blackberries! I guess because the berries were all different colors that in my peripheral vision automatically thought there were just leaves. Oh how wrong I was.

On my way back to the house after my run, I stopped off to see if the blackberries were ripe enough to eat. I lucked out and they were ready! I walked back to the house, grabbed a collinder, wrote a note to Lucky letting him know where I had gone, and back up around the corner to the blackberry bushes. Thirty minutes and one full collinder later I was on my way back to the house. It took all my willpower not to eat the berries before I got them inside and washed.


After a full day of errands we were finally able to go home and take some time to make a cobbler - a request from my wonderful husband. I searched my favorite recipe website for a popular blackberry cobbler recipe, Allrecipes.com, and finally found one that received 4 1/2 out of 5 stars and 6,527 people had saved. I could safely say this one was most likely a good one.

Starting off, I started preheating the oven at 350°, threw 1/2 cup of butter in a 10-inch baking dish and melted it in the microwave for 90 seconds.


While that was melting, I mixed 1 cup of sugar and 1 cup of water in a saucepan, turned on the stove and let the sugar water boil to make a simple syrup. {Note: whenever you need to make a simple syrup, either for baking or for mint julep cocktails, boil water and sugar together until the sugar is melted. Done. Simply syrup.}


While the sugar water was melting in the pan, I put 1-1/2 cups of self rising flour* in a separate bowl, cutting in 1/2 cup of cold butter to make a crumbly dough.


Add 1/3 cup of room temperature milk to the mixture,

mixing together with a fork until everything comes together and the dough pulls away from the sides of the bowl. {Another note: you are not going to get all the crumbs to come together into the dough. That's ok. When you turn out the dough onto the counter you can push those crumbs into the rest of the dough.}
The Force is strong with this milk.
Turn out onto a floured surface; knead three or four times. As you can tell from the pictures, I didn't put four down on the counter, I used the crumbs to act as the extra flour so the dough ball wouldn't stick to the surface.


Cut the dough in half, flatten one half to put in the bottom of the baking dish with the melted butter.


Add 2 cups of fresh blackberries. Add another 1/2 cup to 1 cup of berries because you can't stop yourself from eating them.


Flatten out the other half of the dough and add it to the top of the berries.


Pour your cooled simple syrup** on top of the cobbler and try not to freak out that the sheer amount of syrup versus berries and dough. I promise you it will all be soaked up during the baking process.
Throw it into the preheated oven {ok, maybe not THROW it into the oven as much as gently slide it into the oven so as not to break the dish or spill the contents} and baked it for 45 minutes.

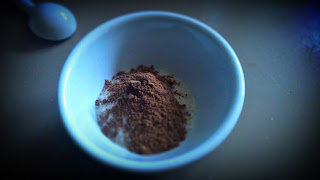
While the cobbler was baking, I mixed two tablespoons of sugar with 1-1/4 teaspoons of cinnamon.

Sorry for the bad pics all of a sudden. My camera's batteries died right at this moment and I can't find any more around the house. :S


After the 45 minutes was up I sprinkled the sugar/cinnamon mix on top of the cobbler and put it back in the oven for another 15 minutes. I was just looking to create a slightly crispy crust with the sugar mixture.
It worked.


At the very last second I whipped up some heavy cream to add on top of the cobbler. I was originally going to add some powdered sugar to the cream but it seems like I am no longer the owner of any powdered sugar, I just whipped the cream. It actually works well to counteract the sweetness of the cobbler.


And there you have it.

Well, actually there I have it. ;)

Hopefully now you will too.


*I never have any type of flour on hand except for all-purpose flour and because this recipe calls for self-rising flour I used the following addition: use 1-1/2 cups all-purpose flour plus 1/4 teaspoon salt and 2-1/4 teaspoons of baking powder.

**Obviously there are more low-sugar modifications for this recipe but some of my blackberries were kind of tart so I wanted to make sure the cobbler was nice and sweet.


Here's the full recipe for you which is a version of the recipe I found on Allrecipes.com.

Blackberry Cobbler (adapted from Allrecipes.com)
Serves 8

Ingredients
1 cup butter or margarine, divided
1 cup sugar
1 cup water
1-1/2 cups self-rising flour*
1/2 cup milk, room temperature
2 cups fresh or frozen blackberries
1/2 teaspoon ground cinnamon
2 tablespoons sugar

Directions
1. In a 10" round or oval baking dish, melt 1/2 cup butter; set aside.
2. In a saucepan, heat sugar and water until sugar melts; set aside.
3. Place flour in a mixing bowl; cut in remaining butter until fine crumbs form.
4. Add milk, stirring with a fork until dough leaves side of bowl. Turn out onto a floured surface; knead three or four times.
5. Cut dough in half, roll out one half and place in bottom of baking dish with melted butter. Spread berries over dough.
6. Roll out other half of dough and carefully place on top of berries.
7. Pour sugar syrup on top of dough (syrup will be absorbed).
8. Bake at 350° F for 45 minutes.
9. Sprinkle sugar and cinnamon over top and back an additional 15 minutes.
Serve warm or cold

*If self-rising flour is not available, use 1-1/2 cups all-purpose flour plus 1/4 teaspoon salt and 2-1/4 teaspoons of baking powder.

Wednesday, September 1, 2010

"Hidden Treasure" Bread Pudding


hi foodie followers!   I realize I've been neglectful of the Blog lately...  but don't you fret!  we have been eating (though mostly on the go), and have been relying on faithful recipes (or take out).  what I'm saying is, there's been nothing to blog about.  well, there is one thing to blog about, but that's for another day...

ANYWAY. let's get to the task at hand and discuss the fact that I made pudding.  homemade.  with my own hands.  no boxes involved!!!  it was really easy and adding rum to it made me feel classy.

the recipe:
2 eggs
3 egg yolks
1 1/2 cups half-and-half
1/2 c plus 2 tbsp granulated sugar
1 tbsp Rum
2 tsp vanilla extract
1/4 tsp kosher salt
1 c semi-sweet chocolate chips
2 c firmly packed stale 1/2 in. croissant cubes

so, you basically combine all of the ingredients then let it sit. place the chocolate chips in the bottom of the ramekins, add the bread cubes, fill the ramekins 3/4 full of the liquid then let it soak for 20 min. bake in a water bath (boiling water) for  20 min. let sit for 20 min. then let cool on a wire rack before serving.

obviously you can see it was A LOT of waiting around. this is not one of those desserts you want to make when you're really hungry (I was) or impatient (I am).

the verdict: I'm undecided.  for one thing, I didn't ruin it. I really loved the croissants and loved how they smelled baking in my oven.  I can't tell if the chocolate added something special to it or took away from it.  I also should add that I sprinkled in some fresh grated Nutmeg and a splash of Cinnamon. (in my opinion if you're going to heat Rum you need those 2 things with it.)

I wish I would've just used raisins like I originally wanted to instead of the chocolate, but I really thought my husband would enjoy the chocolate...  until he got stuck at work and won't be able to eat it now...

any takers?
~pam

Wednesday, April 21, 2010

Lemony-Tarragon Crab Dip with Salt & Vinegar Chips

this recipe was also used for my work pot-luck.

the ingredients:
1/4 c. (1 oz) cream cheese
3 tbsp. finely chopped red onion
2 tbsp.mayonaise
1 tbsp. plus 1 1/2 tsp. fresh lemon juice
2 tsp. chopped fresh Tarragon
2 tsp. chopped fresh Dill
1/2 tsp. lemon zest
8 oz. fresh crab meat
1/4 c. finely chopped cucumber
Salt and Vinegar chips for serving

I have a soft spot in my heart for crab dips.  in general, I feel like you can't go wrong mixing cream cheese with ANYTHING.  so you imagine my disappointment when I see only 1/4 c. being called for in this recipe...

I didn't like this dip one bit.  some thoughts from co-workers:
"it's not bad, but it's not like 'ohmigod this is SO GOOD."
"it would be better warm."
"what if you put it on a crustini and warmed it thru?"
"I don't know what it is, but it isn't bad."
"the artichoke dip is really good!"

they're right- it wasn't bad.  but it also wasn't full of cream cheesey goodness.

I have to give props to the authors of the recipe because they will also give conversions for dried herbs if fresh aren't available.  but...

I guess you can tell what I would have done to improve upon this recipe.
~pam

Artichoke & Green Onion Dip

I would like to start off this post by saying that I have never eaten an artichoke.  I have had samplings of artichoke dips in the past, but have never really sought out eating one.   seems like a lot of work with little reward, I guess.

I decided to make this recipe because we were having a pot luck at work and I was responsible for side dishes.  I also thought it was a good idea to make this recipe because I knew it wouldn't be wasteful (in case I didn't like it).

the ingredients:
2 cans (14 oz) water-packed Artichoke Hearts, drained & chopped
1 1/2 c. Mayonaise
1 1/2 c. finely grated Parmesan cheese
1/3 c. plus 2 tbsp. sliced Green Onions, green part only
2 tsp. minced garlic
1 1/2 tsp. fresh Thyme
1/4 tsp. kosher salt
1/4 tsp. fresh ground pepper
bagel chips, crackers or french bread slices for serving

(I also made another dip- that recipe will follow- but can I just say MAYONAISE?!  seriously, that is a lot of...  fat.)

so, combining all of these ingredients together I have to say the mixture smelled liked vomit and I was really nervous it was going to taste like crap and I wouldn't be able to serve it.  the recipe said you could make it 1 day ahead and bake it before serving the next day.  I woke up early enough to bake it in the morning and nuked it in the microwave for 2 minutes before serving.

my vote: it tasted good.  I personally think the garlic and cheese saved the day.  I was also really excited I couldn't taste all of the mayo in it.
co-workers consensus: it was really good!  (I also saw several people go back for a second helping, but that could also be because my dishes were 2 of the 3 actually provided.  don't get me started on this "pot luck.")

no pictures, sorry.  I'm not going to get all vain at work...
~pam

Green Chili Stew

So it's been a while since I last posted a recipe.  (It's been about that long since I last cooked anything at home!)  Finally last night I decided that enough was enough and set to work making something to make me forget about the dreary weather we've been having in Seattle.

Before I begin let me give you a little bit of background as to why I don't cook anything worthwhile all that often. 

My husband, Lucky, is a tattoo artist and typically doesn't get home until 10 or 11 at night.  That just leaves me and the kids from when I get home from work at about 5:45pm until they go to bed at 8:30.  And we all know how picky my kids can be refusing to eat anything remotely healthy if it doesn't include peanut butter, honey, and/or pasta.  So there isn't really anything besides bread, peanut butter, pasta, butter, and honey in my house at all times.  If I want something else I have to go to the store.  With two little kids.

Say it with me people: P.L.A.N.N.I.N.G.

Planning.  I'm not that great at planning.  I'm normally at the store before I decide what I want for dinner and that normally it's something quick and easy that I don't have to think about.  Or I just wait for Lucky to get home and we'll eat Thai takeout or pizza.  Yes, I know, VERY HEALTHY.

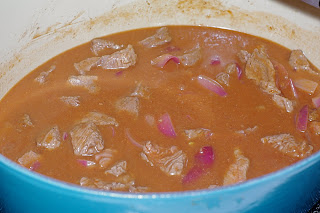
Early in the day I knew that I was going to the store after work so I decided that I wanted to cook something for dinner.  Looking out my office windows it was dark and dreary outside so I figured something hearty and comforting would do the trick.  My go-to food style is Mexican (I'm from San Diego) and it took me about 30 seconds to decide on the Green Chile Stew with Pork recipe from AllRecipes.com would be just what the doctor ordered.  I changed up the recipe a little bit and used chicken instead of pork but other than that I used all the other ingredients.

I also was so focused on making my stew (while making a separate dinner for Kate and Oliver) that I forgot to take pics of the process.  It was pretty easy.  Just sauteeing the chicken and throwing the rest of the ingredients into the pot.  We can all imagine those pictures in our head right? ;)

Green Chile Stew with Pork
Adapted from AllRecipes.com

3 pounds boneless pork loin, cubed (I only used 2 pounds of chicken instead of pork, sliced into strips)
3 tablespoons peanut oil
3 stalks celery, chopped (I only used 2 stalks)
2 tomatoes, chopped (I only used 1 tomato)
7 green chile peppers, chopped (I only used 5 peppers)
4 cloves crushed garlic (Heck yeah I used all 4 cloves!)
4 cups chicken broth (I used roughly about 3 cups)
1 (10 ounce) jar prepared green chile salsa  (Maybe only a cup)
salt to taste
 
1.In a large pot over medium high heat, brown the chicken in oil, for 4-5 minutes. (Until the chicken is almost completely cooked.) 
 
2.Add celery, tomatoes, chilies, and garlic.

3.Add green chile salsa and just enough chicken broth to barely cover the ingredients and bring to boil. Cover and simmer until stew is thick and meat very tender, about 1 1/2 hours. Add salt to taste before serving. If stew is not hot enough, add a bit of jalapenos salsa.
 
 
The recipe turned out great.  The last time I made it I used pork and had put everything into a slow cooker to cook for 8 hours.  Both times the stew turned out amazing.  This is definitely a keeper; all I get are rave reviews on the recipe and if there's not enough to go around, I get faces like this:
 
Oh yes, that is a real face from Oliver when my stew was gone...

Sunday, April 18, 2010

Baby Back Ribs with Macaroni & Cheese


I let Jake pick our menu tonite.  he obviously went for a meat dish.  I typically don't pick pork ribs for myself because they upset my belly, but I obliged because in my very first post I said I would do every recipe.  and also because he selected mac & cheese and in general, you can't go wrong there.

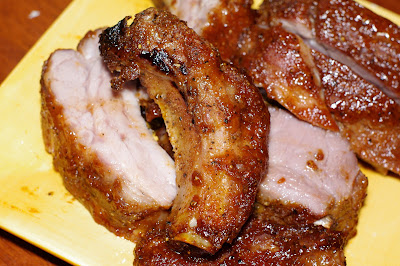
the ribs consisted of a dry rub and BBQ sauce.

the ingredients:
1/3 c. firmly packed brown sugar
2 tbsp. paprika
2 tbsp. onion powder
1 tbsp. plus 1 tsp. kosher salt
1 tbsp. freshly ground pepper


you will also need: 2 slabs baby back ribs and 1/2 c. prepared BBQ sauce (Jake prefers Sweet Baby Rays.)


the final consensus was that they were "interesting."  and that was with pronouncing EVERY syllable in the word.  he also finished the entire plate, I got a chunk off of ONE of the ribs.  personally, I think the dry rub was a bit much.  I would prefer one or the other.

now onto the mac & cheese!

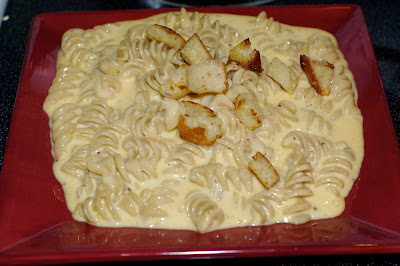
first- lets just say I got to make homemade bread crumbs!  which really turned out to be croutons, but whatever.  normally I would coat my bread bits in olive oil, salt and pepper and bake them, but this recipe called for them to be saute'd in butter.  they turned out good, though I wish I didn't use the leftover french bread that we had.

the ingredients:
1 egg
3/4 c. evaporated milk
1 tsp. Dijon mustard
1/4 tsp. kosher salt
freshly ground pepper
dash of red pepper sauce*
4 oz. elbow macaroni**
1 tbsp. unsalted butter
1 1/2 c. shredded sharp cheddar cheese***

*I used Siracha sauce.
**I used what we had in the cabinet.
***I only had 1 c. cheddar cheese, so I ended up using my Mexican blend of cheese for the other 1/2 c.

so this was ok for me.  nothing I would write home about.  the sauce was really creamy, Jake said it was "rich" although I don't agree.  my only complaint was that I could taste the mustard in it.  Jake's complaint was that it needed more noodles.  I think the bread crumbs saved the day because it added a nice crunch in the mix and also an interesting flavor in the background.

no cooking for me tomorrow.  I have a long day of work ahead of me and Jake's already promised me Thai take-out.
~pam

Saturday, April 17, 2010

Beef Paprika


so Jake is finally home from two months at sea.  one thing he definitely looks forward to is homemade meals.  one thing I look forward to is cooking for him.  yes, I love the gesture of making dinner for my man.  and tonite- I decided on making one of my childhood favorites, Beef Paprika!  we found these amazing egg noodles at a German Delicatessen by our house today and it sparked my desire to make this recipe (since it's the only one I know of that calls for egg noodles.)  this recipe is also not from one of my cookbooks, its from a recipe card that mom gave me.  it's so very...  vintage.

how adorable is this recipe card?!

the ingredients:
1/4 c. shortening*
2 lbs. beef chuck or round, cut into cubes
1 c. sliced onions
1 clove garlic, minced
3/4 c. Ketchup
2 tbsp. Worcestershire sauce
1 tbsp. brown sugar
2 tsp. salt
2 tsp. paprika
1/2 tsp. dry mustard
dash cayenne red pepper**
1 1/2 c. water***
2 tbsp. flour plus 1/4 c. water****
3 c. hot cooked noodles

*I used olive oil- I told you this recipe was old.
**not an ingredient I have in my house, I used a pinch of red pepper flake.
***I use 1/2 stock, 1/2 water combination.
****I skip this step.  I dust the meat in flour before browning, I find that this method thickens the sauce nicely and also lets you off the hook from making a thickener.  if you want to do this method, I would use corn starch instead.  (it gives a nice glossy look to the sauce and you don't run the risk of it tasting like flour.)

browning the meat, onions & garlic.

making the sauce.  be sure to scrape the good bits off the bottom of the pan!

I can not put into words how delicious this sauce is!  I just think you all need to make it and tell me what you think.  you can't go wrong.  oh, AND it's all made in the same pot so that's nice.  well, except for the noodles- but you get what I'm saying.

we also found these amazing Pretzel Bread Rolls @ the German Delicatessen.  OMG

for dessert I'm making Jake Erin's recipe for Salted Brown Butter Rice Crispy Treats.  if you guys haven't tested that recipe yet, make that one first,  then come back to this one!
~pam