Showing posts with label food. Show all posts

Wednesday, April 21, 2010

Green Chili Stew

So it's been a while since I last posted a recipe.  (It's been about that long since I last cooked anything at home!)  Finally last night I decided that enough was enough and set to work making something to make me forget about the dreary weather we've been having in Seattle.

Before I begin let me give you a little bit of background as to why I don't cook anything worthwhile all that often. 

My husband, Lucky, is a tattoo artist and typically doesn't get home until 10 or 11 at night.  That just leaves me and the kids from when I get home from work at about 5:45pm until they go to bed at 8:30.  And we all know how picky my kids can be refusing to eat anything remotely healthy if it doesn't include peanut butter, honey, and/or pasta.  So there isn't really anything besides bread, peanut butter, pasta, butter, and honey in my house at all times.  If I want something else I have to go to the store.  With two little kids.

Say it with me people: P.L.A.N.N.I.N.G.

Planning.  I'm not that great at planning.  I'm normally at the store before I decide what I want for dinner and that normally it's something quick and easy that I don't have to think about.  Or I just wait for Lucky to get home and we'll eat Thai takeout or pizza.  Yes, I know, VERY HEALTHY.

Early in the day I knew that I was going to the store after work so I decided that I wanted to cook something for dinner.  Looking out my office windows it was dark and dreary outside so I figured something hearty and comforting would do the trick.  My go-to food style is Mexican (I'm from San Diego) and it took me about 30 seconds to decide on the Green Chile Stew with Pork recipe from AllRecipes.com would be just what the doctor ordered.  I changed up the recipe a little bit and used chicken instead of pork but other than that I used all the other ingredients.

I also was so focused on making my stew (while making a separate dinner for Kate and Oliver) that I forgot to take pics of the process.  It was pretty easy.  Just sauteeing the chicken and throwing the rest of the ingredients into the pot.  We can all imagine those pictures in our head right? ;)

Green Chile Stew with Pork
Adapted from AllRecipes.com

3 pounds boneless pork loin, cubed (I only used 2 pounds of chicken instead of pork, sliced into strips)
3 tablespoons peanut oil
3 stalks celery, chopped (I only used 2 stalks)
2 tomatoes, chopped (I only used 1 tomato)
7 green chile peppers, chopped (I only used 5 peppers)
4 cloves crushed garlic (Heck yeah I used all 4 cloves!)
4 cups chicken broth (I used roughly about 3 cups)
1 (10 ounce) jar prepared green chile salsa  (Maybe only a cup)
salt to taste
 
1.In a large pot over medium high heat, brown the chicken in oil, for 4-5 minutes. (Until the chicken is almost completely cooked.) 
 
2.Add celery, tomatoes, chilies, and garlic.

3.Add green chile salsa and just enough chicken broth to barely cover the ingredients and bring to boil. Cover and simmer until stew is thick and meat very tender, about 1 1/2 hours. Add salt to taste before serving. If stew is not hot enough, add a bit of jalapenos salsa.
 
 
The recipe turned out great.  The last time I made it I used pork and had put everything into a slow cooker to cook for 8 hours.  Both times the stew turned out amazing.  This is definitely a keeper; all I get are rave reviews on the recipe and if there's not enough to go around, I get faces like this:
 
Oh yes, that is a real face from Oliver when my stew was gone...

Sunday, April 18, 2010

Baby Back Ribs with Macaroni & Cheese


I let Jake pick our menu tonite.  he obviously went for a meat dish.  I typically don't pick pork ribs for myself because they upset my belly, but I obliged because in my very first post I said I would do every recipe.  and also because he selected mac & cheese and in general, you can't go wrong there.

the ribs consisted of a dry rub and BBQ sauce.

the ingredients:
1/3 c. firmly packed brown sugar
2 tbsp. paprika
2 tbsp. onion powder
1 tbsp. plus 1 tsp. kosher salt
1 tbsp. freshly ground pepper


you will also need: 2 slabs baby back ribs and 1/2 c. prepared BBQ sauce (Jake prefers Sweet Baby Rays.)


the final consensus was that they were "interesting."  and that was with pronouncing EVERY syllable in the word.  he also finished the entire plate, I got a chunk off of ONE of the ribs.  personally, I think the dry rub was a bit much.  I would prefer one or the other.

now onto the mac & cheese!

first- lets just say I got to make homemade bread crumbs!  which really turned out to be croutons, but whatever.  normally I would coat my bread bits in olive oil, salt and pepper and bake them, but this recipe called for them to be saute'd in butter.  they turned out good, though I wish I didn't use the leftover french bread that we had.

the ingredients:
1 egg
3/4 c. evaporated milk
1 tsp. Dijon mustard
1/4 tsp. kosher salt
freshly ground pepper
dash of red pepper sauce*
4 oz. elbow macaroni**
1 tbsp. unsalted butter
1 1/2 c. shredded sharp cheddar cheese***

*I used Siracha sauce.
**I used what we had in the cabinet.
***I only had 1 c. cheddar cheese, so I ended up using my Mexican blend of cheese for the other 1/2 c.

so this was ok for me.  nothing I would write home about.  the sauce was really creamy, Jake said it was "rich" although I don't agree.  my only complaint was that I could taste the mustard in it.  Jake's complaint was that it needed more noodles.  I think the bread crumbs saved the day because it added a nice crunch in the mix and also an interesting flavor in the background.

no cooking for me tomorrow.  I have a long day of work ahead of me and Jake's already promised me Thai take-out.
~pam

Wednesday, April 14, 2010

1-2-3 Mexican Dip


 first off lets start this post with my insane craving I had last nite.  I was really in the mood for biscuits from Popeye's.  you know the ones I'm talking about...  I thought I could manage to make some and found a recipe on www.foodnetwork.com.  one thing I realized about myself last nite: I am NOT a midnight baker.  other things that are really important: it's critical to measure out ingredients when baking.  it's also probably critical to not forget certain ingredients (as I later found out there's a "science" to baking, you need the right acidity to make a balanced biscuit, so when I forget an ingredient like say, LEMON JUICE, they're probably going to taste like shit.)  the biscuits rose just fine, and browned on the top like they were supposed to.  however, they were hard as hockey pucks and only a morsel of each one was edible.

some cravings need to be satisfied by the original creator.

for tonight's recipe I decided that I would go to one of my survival foods.  yes folks, I'm pretty sure I could survive on chips and salsa.  this recipe seemed easy enough (boy was that a joke, there's a lot of steps and measuring out the ingredients you already had measured out- what's that about?!).  anyway, lets get on with it.
the ingredients:
1 can Refried Beans
1 1/2 c. medium Salsa
1 tsp. Chili Powder
 1 tsp. Ground Cumin
3/4 tsp. dried Oregano
1/2 c. Mayonaise
1/4 c. finely chopped Red Onion
1/3 c. chopped fresh Cilantro
1 tsp. Onion Powder
1 small Red Bell Pepper, chopped
1 c. grated Extra-Sharp Cheddar Cheese
1 fresh Japapeno chile
Tortilla chips for serving

1-2-3 layers, no?

this recipe was a chore to make.  there is a lot of "divide this" and mix that".  in the end I used 3 different spoons, one spatula and 3 bowls (not including the one it was served in) just to make this dish.  I liked it.  I mean, I ate half the bowl for dinner...  so it wasn't a total loss.  or total mess for that matter.  I'm just not sure it's any better than any 7-layer dip you could find in the grocery store.

the recipe didn't call for black olives, but I couldn't resist.

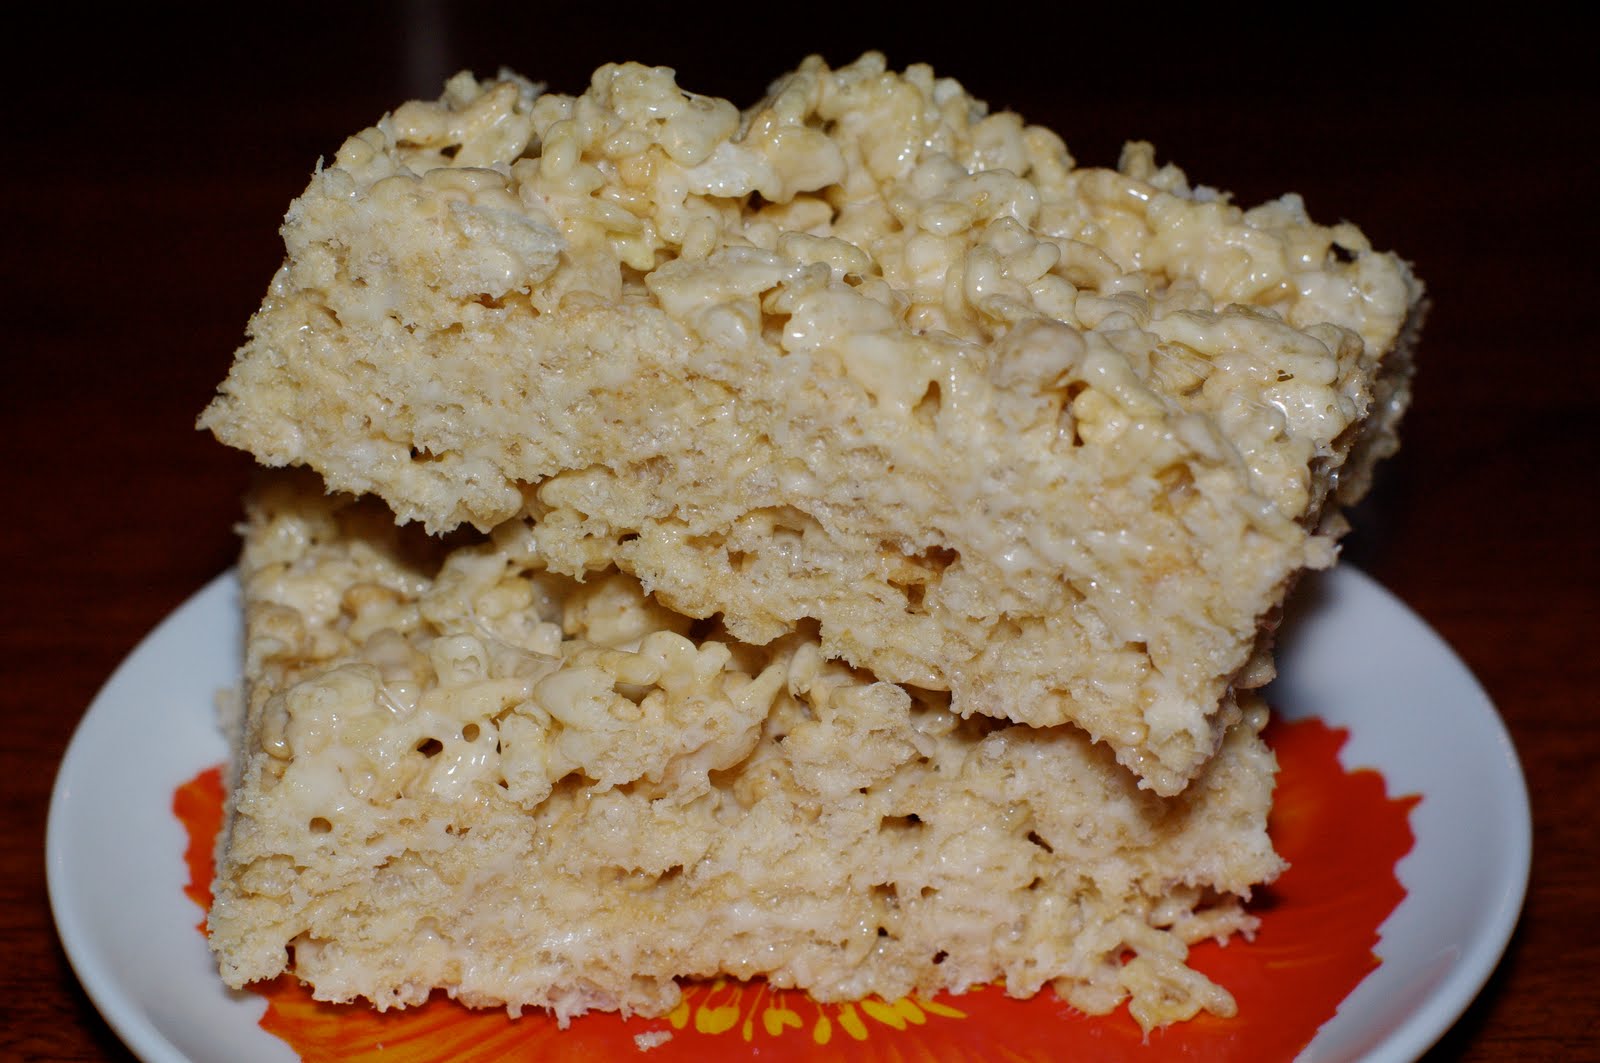
as a treat to myself, I decided to try Erin's Salted Brown Butter Rice Crispy Treats!  OMG.

the best Rice Crispy Treat EVER.

~pam

Monday, April 12, 2010

Marinated Olives and Feta Cheese


the ingredients:
1/2 c. Extra-Virgin Olive Oil
2 tsp. grated Lemon Zest
2 tsp. fresh Lemon Juice
5 medium cloves Garlic, sliced
1/4 c. chopped fresh Flat Leaf Parsley
1 tbsp. Herbes de Provence
3/4 tsp. Dried Chili Flakes
1 c. Kalamata or Black Olives
1 c. Green Olives
10 oz. Feta Cheese
French Bread slices

UNIMPRESSED.

well ladies & gents, I think we have finally hit a recipe low.   it was...  oily, dare I say?  I don't even know how to improve upon it, since so many things seem to go wrong with it.  maybe if it wasn't marinated and you just mixed everything together on the spot it would taste better.  at least the consistency would be better and the olives would seem less slimy.

I'm pretty irritated since this recipe has tons of my favorite things to eat: olives, feta, lemon, garlic & bread.

I have no more words.  the only thing that can cure this is an episode of Tori & Dean: Home Sweet Hollywood and ice cream.  (and maybe watching Julie & Julia again for some inspiration.)

here's hoping to a better recipe tomorrow,
~pam

Salted Brown Butter Rice Crispie Treats

So, after being told MANY TIMES from my colleague, Violet, I finally decided to give these "most delicious Rice Crispie treats in the world" a try.  I wasn't skeptical - Violet's an expert when it comes to amazing food - but I never make dessert so I never put ingredients on my store list.  I was in one of my "baking moods" but didn't want to spend a large amount of time in the kitchen so I turned to a jazzed up version of an oldie but goodie.


I turned to the ever-wonderful Smitten Kitchen blog and searched out the Salted Brown Butter Crispy Treats recipe.  Looking at the recipe, there wasn't much difference between a regular rice crispy treat recipe and this marvelous version except for the addition of a little salt and cooking the butter a little bit longer.  But man, those little tweaks made all the difference in the world.

Salted Brown Butter Crispy Treats
Makes 16 2-inch squares or 32 1- x 2-inch small bars

4 ounces (1/4 pound or 1 stick) unsalted butter, plus extra for the pan
1 10-ounce bag marshmallows
Heaping 1/4 teaspoon coarse sea salt
6 cups Rice Krispies cereal (about half a 12-ounce box)
Butter (or coat with non-stick spray) an 8-inch square cake pan with 2-inch sides.

In a large pot, melt butter over medium-low heat. It will melt, then foam, then turn clear golden and finally start to turn brown and smell nutty. Stir frequently, scraping up any bits from the bottom as you do. Don’t take your eyes off the pot as while you may be impatient for it to start browning, the period between the time the butter begins to take on color and the point where it burns is often less than a minute.

As soon as the butter takes on a nutty color, turn the heat off and stir in the marshmallows. The residual heat from the melted butter should be enough to melt them, but if it is not, turn it back on low until the marshmallows are smooth.

Remove the pot from the stove and stir in the salt and cereal together. Quickly spread into prepared pan. I liked to use a piece of waxed or parchment paper that I’ve sprayed with oil to press it firmly and evenly into the edges and corners, though a silicon spatula works almost as well.

Let cool, cut into squares and get ready to make new friends.


First I had to enlist one of my favorite helpers to test out a key ingredient.


Turns out, the little munchkin was testing out both the marshmallows AND rice crispies behind my back.  Every time I would look at her she would cover her mouth like she was fooling me....


We followed the directions exactly as mentioned and were done in a matter of minutes.  The longest step was making sure the butter was cooked long enough.


The butter turned a brown color as mentioned above and I was worried that it would make the treats turn out an unappetizing brown but I could hardly notice a different when it was all mixed together.


How did they taste?  Let's just say that if Lucky and I weren't already married I would have garnered a marriage proposal right then and there.

Magnifique!

Simmering Tomato Sauce with Butter

I was perusing my cookbooks on Saturday trying to figure out what to make the kids for dinner.  Normally I wouldn't have a problem deciding on one recipe however nothing was sounding good with my current list of recipe requirements.  Mind you, I have a 15-month-old son that will eat anything and everything under the sun - except lately because he's teething and his mouth is sore when he chews.  I also have a 4-year-ol daughter that doesn't like anything she hasn't tried before and apparently doesn't trust dear old Mom and Dad to assure her that whatever we give her will be really good.  We promise.  Isn't she supposed to stop trusting us when she's 16 and finally realizes we've been telling her lies all these years just to see her reactions?

So, mushy food and something relatively similar to meals we've had in the past.  And it must be quick.

Awesome.  That makes for an exciting dinner from one of my cookbook recipes.

So I decided to skip dinner for the time being and focus on dessert.  We normally don't have dessert but I was in "a mood" and wanted to cook or bake something sweet.  That reminded me of an amazing recipe at Smitten Kitchen that was recommended to me from Violet, and if my memory served me correctly the recipe was both easy and quick. Perfect!

Now that the dessert is out of the way, back to the main course.  I decided to scroll through some of the other recipes at Smitten Kitchen and I came to a rediculously fast, easy recipe that catered to all of my meal requirements.  Four ingredients with one of them being pasta?  Heck yeah!

Tomato Sauce with Butter and Onions

Serves 4 as a main course; makes enough sauce to lightly coat most of a pound of spaghetti

28 ounces (800 grams) whole peeled tomatoes from a can (San Marzano, if you can find them)
5 tablespoons (70 grams) unsalted butter
1 medium-sized yellow onion, peeled and halved
Salt to taste

Put the tomatoes, onion and butter in a heavy saucepan (it fit just right in a 3-quart) over medium heat. Bring the sauce to a simmer then lower the heat to keep the sauce at a slow, steady simmer for about 45 minutes, or until droplets of fat float free of the tomatoes. Stir occasionally, crushing the tomatoes against the side of the pot with a wooden spoon. Remove from heat, discard the onion, add salt to taste (you might find, as I did, that your tomatoes came salted and that you didn’t need to add more) and keep warm while you prepare your pasta.

Serve with spaghetti, with or without grated parmesan cheese to pass.

 
I followed the directions and it took literally 3 minutes to get everything into a saucepan and the temperature to medium-high.  And then I was done.  I stirred it every once in a while and broke up the tomatoes but that was it.  I actually made my dessert while dinner was cooking because I felt lost just standing there.


When I was done both Kate and Oliver decided that they wanted only buttered noodles instead of having sauce with it but I'm sure it was just because the noodles were so cool to look at.


Overall, I felt it was a good recipe to have when the summer days are long and there are too many tomatoes in the garden to know what to do with.  Although this recipe called for a can of whole tomatoes and the sauce ended up being a tomato-y sweet goodness, I have the idea that fresh tomatoes are going to make it taste even better.  Next time I'll also add italian seasoning and maybe some fresh garlic to cater more towards the family's tastes.  Nevertheless, this recipe was a great, fast, easy addition to my growing collection of "good 'uns."

Sunday, April 11, 2010

Lamb Chops with Mint-Mustard Sauce and Sweet Peas with Red Onion & Mint


I'm pretty sure this is the best thing I have EVER made in my life!  Jake would argue and say that it's my beef stew, but he doesn't like lamb, so we can't get his opinion on the matter- now can we?

I would also like to throw out there that as of this moment (I mean, this meal) lamb is my favorite meat.  hands down.  Mom's go-to-meal for Easter was traditionally lamb, I looked forward to it every year.  I think it had something to do with the mint jelly...

the ingredients:
2 tbsp. Mint Jelly
1 tbsp. White Wine Vinegar
1 tbsp. Stone-Ground Mustard
1/4 c. Chicken Stock*
1 tbsp. Vegetable Oil
6 Lamp Chops**

*I used low-sodium
**I used 3, since I'm cooking for one right now.

the first 4 ingredients are for the sauce- it smelled really harsh since vinegar has such a pungent odor to it.  and to be honest, it looks kind of gross seeing green jelly float around with mustard seeds...  but TRUSTMEONTHIS- it's the best-tasting sauce ever, you will never go back to plain mint jelly again!  

lets also point out that I made a reduction!  I actually reduced stuff down to half it's starting size and made a sauce.  hell yeah.

I never cook with vegetable oil, unless its called for in my baking.  the recipe told you to heat the oil on high and cook the chops 3 minutes on each side for medium-well.  I nearly smoked my damn house out!  Vegetable oil gets EXTREMELY HOT!  hotter than Olive Oil can (because it will burn and turn gross), I thought I was going to burn my chops, so I hurriedly flipped them over and started cooking on the other side, while I reduced the heat down to medium-high.  I'm not a medium-well-person, I'm a kill-it-well-person.  I don't want it to look like the meat on my plate will be able to walk off of it because it's bleeding so much; I followed their instructions since I'm not at all familiar with cooking lamb.  the chops weren't cooked to my liking.  they were so red on the inside I didn't think the heat evenly distributed thru.  I placed them back in the pan with the sauce and cooked them for an extra 3 minutes.  let me tell you, the authors need to add this step into their recipe because this actually helped to thicken the sauce a little more and it made a little bit of a glaze on my perfectly browned chops. 

this meal was finger-licking good.  I felt like an animal pulling the meat off the bones.

I went back for seconds.

the ingredients:
2 c. fresh peas or 10 oz. frozen
1 tsp. Unsalted Butter
1/4 small Red Onion
1/4 tsp. Kosher Salt
1 tbsp. Fresh Mint or 1 tsp. dried
2 tsp. Extra-Virgin Olive Oil

you would think hearing "mint" in the title means it would be over bearing in a recipe, but I assure you it isn't.  you sweat the onions down in butter, saute the peas and add the olive oil and mint at the last second.  this method wilts the leaves down, so you just get a hint of the mint in the background of each bite.  very delightful, and despite butter being in the recipe- it didn't taste heavy.


I remembered the last of my ingredients to finish of the marinade for my olives and Feta.  I'll be posting that recipe tomorrow once I get to taste it.  while I was at Borders getting my Regretsy book and Owl mug...  I got side-tracked once again by the cookbooks section and had both the Joy of Cooking and Mastering the Art of French Cooking in my hands.  I nearly bought the damn things!!!  then I brought myself back down to Earth and realized I could get them for less at Barnes & Noble (I have a membership and plus I find Borders to be rather expensive.)  oh, don't mention that I still have 8 cookbooks I haven't opened...

what is with all of the delicious smelling pretzel places in malls?!  gosh.  it took everything in my power to keep walking.  gluttonous.

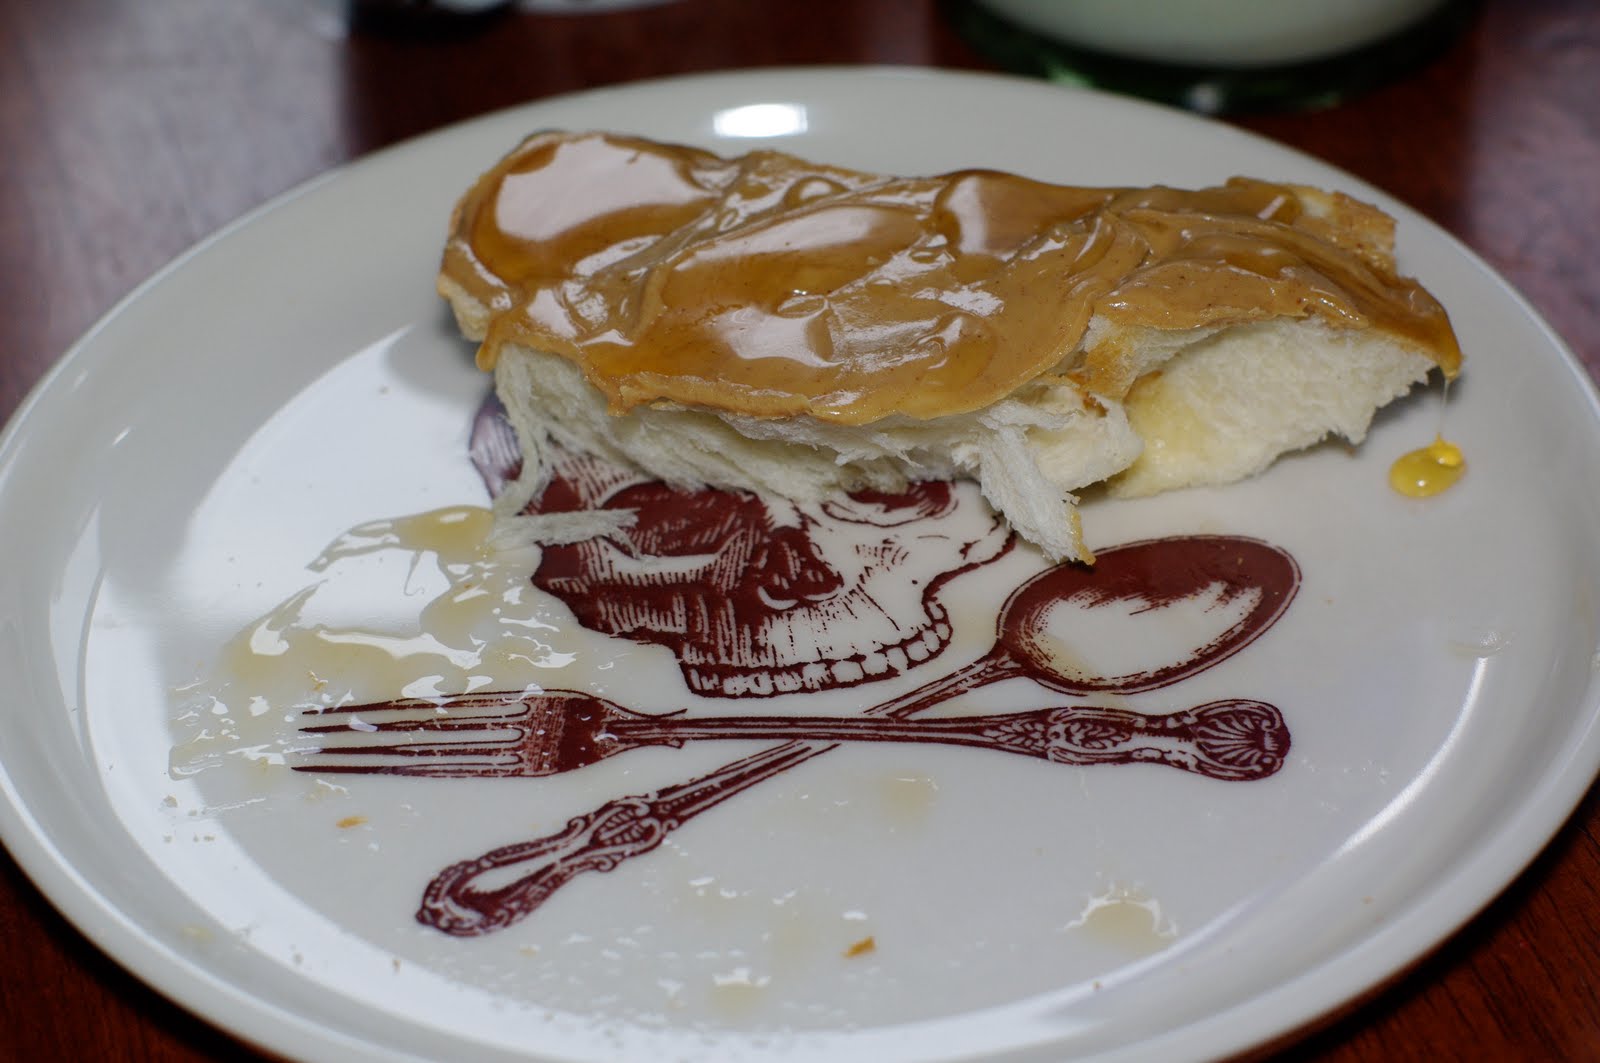
Peanut Butter Toast with Icy-Cold Banana Milk


breakfast this morning consisted of something I usually make, just not with Challah or Maple Syrup.  it was good- nothing special or worth making when your in-laws come to visit, but I suspect if you have children this would be a nice twist to present to them.
the ingredients:
2 slices of Challah
2 c. Milk
2 small, ripe Bananas
1/4 c. Maple Syrup
2 tsp. Vanilla Extract
3 tbsp. Peanut Butter
Honey for drizzling
Powdered Sugar for dusting
pinch of Nutmeg

now that I write this I realize I left out the Vanilla.  that totally sucks because that's typically my favorite sweetness when it comes to banana milk.  (Nutmeg is my #1 favorite part.)

we'll talk about the toast first: like I said, it's nothing spectacular, but is good to eat.  toasted bread, heated peanut butter and honey is a favorite flavor combination of mine.  I just wouldn't go out of your way to find Challah bread like I did (i.e. go to 4 different grocery stores).  I am more interested in the french toast recipe  that calls for Challah than I am in using it in this recipe!  I didn't use the Powdered Sugar because I think it bears no flavor and just gets messy.


the milk: the authors say they started making this because one of their son's wouldn't drink regular milk.  my milk was super thick so I'd like to meet the child that could suck this stuff through a bottle!  I had to cut mine with about 1/2 c. more milk.  it is really frothy and has a great banana flavor to it.  I didn't notice the Maple Syrup at all...  until I got to the bottom of the glass and found it all sitting there.  if you want to know how I make my banana milk, just ask and I'll share the recipe sometime.

I got these awesome plates from foldedpigs on Etsy.

I couldn't finish.  but I had one bite right about here that really made me want to.  it just got too heavy between the milk, Challah and warmed peanut butter.

I'm off to Borders.  they have some really cute Owl glassware that I've been successfully avoiding for about a month now.  I'm also going to stop by the Humor section and check out Regretsy's new book.

oh!  I also got an awesome vote of confidence from my mother who told me my pictures look like they belong in a magazine.  (I wonder if that means you all really think I'm making this stuff?!)  she's so cute.  she also wants to try the Eggs Benedict recipe- she really loves eggs.  A LOT.

I hope to see you back for dinner!
~pam

Saturday, April 10, 2010

Oatmeal Cookies


I went out to dinner last nite with my cousin Bailey and her boyfriend Sean.  good thing there are recipes in my cookbook for desserts!
the ingredients*:
2 c. All-Purpose Flour
1 tsp. Baking Soda
1 tsp.  Kosher Salt
1 tsp. Ground Cinnamon
2 Eggs @ room temperature
2 tsp. Vanilla Extract
1 c. Unsalted Butter @ room temperature
2 c. firmly packed Light Brown Sugar
2 c. Rolled Oats or Quick-Cooking Oats**
1 c. raisins

* the recipe yielded 48 cookies, I cut it in half for myself.  the ingredients list above reflects what the cookbook says.
** I used Pinhead Oats because it's what I had in my cupboard.

lets just say that this cookie dough is probably the most delicious cookie dough I have EVER eaten out of the bowl...
I am not above using an ice cream scoop to get matching cookies!  this moo scoop was one of Jake's birthday gifts from our little nieces.  it's my favorite to use when making cookies.

the recipe called for the cookies to be baked for 10 min., or "until the edges of the cookies are golden brown and the centers are barely cooked."  I suffered a little trepidation about this, because my oven is unreliable...  I baked them for 12 minutes.

cooked all the way thru- whew!

these cookies were moist, delicious and perfectly chewy (how I prefer cookies).  the ratio of cinnamon-oatmeal-raisin in every bite was just delightful.  Jake would give these "two-thumps-up" for sure.

in closing I'll leave you with my grocery list for the weekend:
 
are you excited?!
~pam

Friday, April 9, 2010

Leftover Easter Eggs into Deviled Eggs

Last weekend my four-year-old Kate dyed 18 eggs into bright colors as part of our Easter celebration.  We took the eggs over to our friend's house Easter Sunday where I had every intention of turning those bright eggs into deviled eggs.  Well, that ended up not happening so I brought the bright, hard-boiled eggs home where they sat in the fridge for a couple of days before I finally had a chance to make deviled eggs.

Let me give you a little background on my relationship with eggs:
  1. As a small girl I only liked the yolks of eggs, not the whites.
  2. Growing older, my likes completely changed and started liking the whites, not the yolks.
  3. As an adult I tend to not like eggs in general but when I do eat them I still prefer the whites over the yolks.
Except for when it comes to deviled eggs. 

For some reason I can eat a dozen by myself and I still have no idea why I like them so much.  I has to be the mustard and vinegar-y, creamy taste - which completely masks the taste of the yolks.  I'm still boggled why this has to be this way.  That's ok, my sister's worse: she can't stand anything with tomatoes in it - except for ketchup.  Which she puts on everything.  I mean EVERYTHING.  I"m more of a mustard fan than ketchup, so GROSS!

Anyway, back to eggs.  I finally had a chance to make some deviled eggs however I couldn't find a recipe that I wanted to try in my cookbooks so I went to my trusty backup, Allrecipes.com.  I love that site more that almost every other site. And that's saying a lot!

I searched for a deviled egg recipe that looked tasty and I had all the ingredients for.  I was originally going to try a basic deviled egg recipe with mayonnaise, mustard, and paprika but I had a feeling that I would have to use a lot of mustard to mask the taste of the yolks. 

I found a different recipe that looked kind of basic but interesting, with sugar and white vinegar being a few of the ingredients.  I decided to use only six eggs so that I had a few left over if I didn't like this recipe.  Turns out, I don't need a different recipe.  This was a great egg recipe that gave you a ZING! from the vinegar but doesn't overpower the overall taste of the egg.  I think this might be my go-to deviled egg recipe however I might try the cheese and bacon recipe once or twice because, really, how can you go wrong with cheese and bacon?


6 hard-cooked eggs

2 tablespoons mayonnaise
1 teaspoon sugar
1 teaspoon white vinegar
1 teaspoon prepared mustard
1/2 teaspoon salt
Paprika (I am out of paprika but it still tasted great)


Slice eggs in half lengthwise; remove yolks and set whites aside. In a small bowl, mash yolks with a fork. Add the mayonnaise, sugar, vinegar, mustard and salt; mix well. Stuff or pipe into egg whites. Sprinkle with paprika. Refrigerate until serving.

Wednesday, April 7, 2010

Wild Rice w/ Dried Cranberries, Green Onions and Pecans with Drop Biscuits


Ingredients:
1/3 c. Pecans, roasted
1 c. Wild Rice
1 tbsp. Extra Virgin Olive Oil
1/3 c. dried Cranberries
2 tbsp. Green Onion (white & green parts)
kosher salt & black pepper to taste

1 c. plus 2 tbsp. all-purpose Flour
1 1/2 tsp. Baking Powder
1 1/2 tsp. Sugar
3/4 tsp. Kosher Salt
1 c. chilled Heavy Cream

so, I started off with the biscuits because I thought I could multitask both parts of my meal and have them done at the same time.  first rule: read your recipe in its entirety BEFORE undertaking your meal.  (you should also read the cooking instructions for your rice.)

the biscuits turned out pretty good, though I think they had too much salt in them.  and I love salt, I just don't love tasting it in every bite.  the recipe had a variation that called for 3/4 c. Cheddar cheese and 2 tbsp. of dried Dill (you also have to add an extra 2 tbsp. of flour to batter), of course I did this version!  I know you don't go to Red Lobster for the seafood- you go for the biscuits!  (guilty.)  I'm glad I added the extra ingredients as I think they biscuits would have just tasted like buttery salt.  and that brings up and interesting point, my biscuits tasted like BUTTER.  I'm not sure how because it's definitely NOT an ingredient.  that said, I doubt you'll need to add butter if you made these.  though I don't think I enjoyed them as much as the writers did, I did eat 3 of them while I was waiting for my rice to cook.
1 c. heavy cream

"drop" biscuits

pale golden on the top, golden brown on the bottom

fluffy on the inside!  YAY!

onto the rice.  I seriously messed this part up.  first off, I didn't buy wild rice, I bought a wild rice blend.  and while the recipe said you COULD do this, I wish I HADN'T done it because I feel it would have tasted better with just wild rice.  second, I didn't read the recipe in it's entirety- this rice takes 45 min. to cook (not including the boil time beforehand)!!!   eeks!  third, I burned the pecans.  (would now be a good time to also mention that I forgot to set the timer for the rice?)

this is what burnt pecans look like.  in case you were wondering...

my favorite part about the rice was the green onion.  how delicious do onions smell when heat hits them!?  oh. my. god.  the cranberries were also a nice touch, I just wish they were a little sweeter in the bites.  I didn't like the pecans in the dish (not because I burned them- I had more), I just didn't like the texture or crunch of them in my rice.

 check out our cute oil bottle from Bread and Badger!

I don't think I'll make the rice again.  I will definitely try the biscuits, without the dill and cheddar cheese, for biscuits and gravy one morning.

what I liked about these recipes: they are VERY easy.  seriously, this has to be one of the easier cookbooks I have worked out of.  the ingredients are simple and the instructions are easy.  so far.


I promised we would address Jake's dislikes with foods as we go along...  I chose this recipe for several reasons, the first being "onion" is in the ingredients list.  second, he HATES nuts mixed in his food.  and more specifically HATES pecans.  third, cranberries.

I have also come up with a method of organization for my cookbook.  the pink tabs are for recipes that I can make for myself.  blue tabs will be for Jake.  yellow tabs will be recipes we have already tried.  I figured I needed to do this because I'm not starting at one end and working my way to the other end and I also don't want repeats since I have 8 more cookbooks to go.

I pulled a recipe off of Food Network today.  I'm making that one next!
until then...  

read your labels BEFORE you start cooking!
~pam

Tuesday, April 6, 2010

I'm Hungry

What do you do when you start talking about cookbooks when you're hungry?

Start a blog.

That's right, folks, the great minds who bring you zombie lego keychains and button cookies come together to make you salivate as much as possible.  So you can be just as hungry as we are.  Sorry. 

Sort of.

I'm really excited to actually go through my cookbooks and make recipes out of them.  Some of those babies have only been open when I first got them and quickly flipped through the recipes.  I always come home and have absolutely no idea what to make for dinner completely disregarding the fact that I have TONS of cookbooks laying around just waiting to be cracked open.  I knew I had quite the collection of books, I just never really KNEW.


I'm going to promise to everyone that as long as I'm contributing to this blog I will continue to make recipes out of my cookbooks so help me God.  I might get some revolt from my four year old who doesn't like anything but turkey sandwiches and mac & cheese at the moment but I don't care.  I'm the boss.  (Isn't that why we become parents in the first place?)

Cheers for now!

~Erin

the plan

after watching Julie & Julia over-and-over again, I am inspired to work my way thru my cookbooks.  if you haven't seen the movie, I urge you too.  it is funny, delightful and delicious.  in fact, it makes me want to buy Mastering the Art of French Cooking, wear pearls and have Julia Child over for dinner.  I might even consider watching her TV show (but her voice has always bothered me, nit-picky, I know...).

my goal: break out my cookbooks (I dug NINE, nine, 9! of them out of my cupboard tonite and I'm not including the 2 magazines that I have with amazing recipes in it, or the two books that came with kitchen appliances)- and cook from these books.  seems simple.  until you break them open and realize that your husband hates most all food and he is going to make this task difficult.  sigh.  

 yes, that is Cooking for Dummies.

we'll reveal Jake's food hates as they approach.  they are too numerous for me to name and list at any one time.

lucky for me, I already have friends that are volunteering to eat these recipes should Jake not like one ingredient.  we have no food allergies in this house, so I'm not sacrificing ANYTHING the recipe calls for.  I will do it, even if I don't like artichoke hearts or hollandaise sauce...

I want to put out there that I am actually a pretty decent cook.  most people that have tried my dishes really enjoy them and ask me what my secrets are.  first off, my main secret might be Food Network.  seriously, those chefs have some great tips!  my second secret is owed to my mom who always made sure we sat down at the table for dinner.  every nite.  I remember cooking beside her, baking (mixing the cookie dough) with her and sitting in the kitchen watching her whirl away as she prepared our food.  my Grandmother would take credit for my mother's cooking- I find them to be completely different- but you can't ever argue a point with Grandma, so we'll let her relish in her thoughts.

we will have a guest blogger, Erin, that will contribute from time to time, as she wants to break open her cookbooks as well.  (Erin has also politely volunteered herself to test out my tasty recipes!)

my first cookbook endeavor will be the Bride and Groom First and Forever Cookbook.  we've been married for 5 years and I think I should start using the book now.

there is a stain on the front cover, I have used it.  once.

I am really excited to use the following book, because it was my mom's (published in 1975) and it was the first cookbook she gave me when I first moved out of the house. 

just look at the tattered love and 70's photos...

WHY am I doing this?
1. I love food
2. I love to eat food
3. I enjoy cooking
4. I have 9 cookbooks
5. I enjoy writing, taking pictures (and eating)- so this is perfect for me
6. projects are fun!  and this is a good one, because we ALL have to eat, right?!
7. (Erin says she is doing this because she loves cookbooks & thought this was a good idea)

I end with what my dinner was this evening: deviled eggs and some Sour Patch jelly beans.  not together.

~pam